Welcome to the Dynex TV User Guide․ This guide provides comprehensive instructions for setting up‚ operating‚ and troubleshooting your Dynex TV․ It covers essential features‚ settings‚ and maintenance tips to ensure optimal viewing experiences․ Designed to help you make the most of your television‚ this manual is a valuable resource for both new and experienced users․
1․1 Overview of the Dynex TV User Guide
This section provides a snapshot of the Dynex TV User Guide‚ detailing its structure and content․ It covers unboxing‚ setup‚ safety precautions‚ remote control functions‚ picture and sound settings‚ connectivity options‚ menu navigation‚ troubleshooting‚ and maintenance․ The guide is designed to help users optimize their viewing experience and resolve common issues efficiently․ It serves as a comprehensive resource for both initial setup and long-term use․
1․2 Importance of Reading the User Manual
Reading the Dynex TV User Manual is essential for safe and effective use of your television․ It provides critical safety precautions‚ setup instructions‚ and troubleshooting tips․ Understanding the guide helps you optimize picture and sound settings‚ connect devices‚ and navigate menus efficiently․ It also ensures compliance with warranty terms and provides guidance for maintaining your TV․ Taking the time to read the manual enhances your overall viewing experience and prevents potential issues․
Safety Precautions for Dynex TV
Ensure your Dynex TV operates safely by following guidelines: avoid water exposure‚ clean with a dry cloth‚ prevent ventilation blockage‚ and keep away from heat sources․
2․1 General Safety Instructions
Always follow safety guidelines to ensure safe operation․ Read the manual thoroughly‚ heed all warnings‚ and keep instructions handy․ Avoid using the TV near water‚ clean only with a dry cloth‚ and never block ventilation openings․ Install the TV as per manufacturer’s instructions and keep it away from heat sources like radiators or heaters․ Adhere to these precautions to guarantee safe usage and optimal performance of your Dynex TV․
2․2 Placement and Environmental Considerations
Proper placement ensures safe and optimal TV performance; Position the TV away from direct sunlight‚ moisture‚ and heat sources like radiators or heaters․ Ensure good ventilation to prevent overheating․ Avoid placing the TV in humid or dusty environments․ Install on a stable‚ flat surface and maintain a minimum distance from walls for proper airflow․ Follow these guidelines to protect your Dynex TV and ensure long-lasting‚ reliable operation in ideal conditions․

Unboxing and Initial Setup
Carefully unpack your Dynex TV‚ ensuring all components are included․ Place the TV on a stable surface and connect the power cord․ Turn it on and follow the on-screen setup instructions to complete the initial configuration‚ including language selection and connectivity options․
3․1 Unpacking Your Dynex TV
Carefully unpack your Dynex TV from the box‚ ensuring all components‚ such as the remote control‚ power cord‚ and stand‚ are included․ Handle the TV with care to avoid damage․ Place the TV on a stable‚ flat surface or mount it according to the manufacturer’s instructions․ Remove any protective packaging materials and ensure the TV is clean before proceeding with setup․ Proper unpacking ensures safe and smooth installation․
3․2 Connecting the TV to Power and External Devices
Connect the power cord to the TV and a nearby electrical outlet․ Ensure the connection is secure․ For external devices‚ use HDMI cables to link devices like Blu-ray players or gaming consoles to the TV’s HDMI ports․ Turn on the devices and use the remote to navigate to the correct input․ This setup ensures seamless connectivity and optimal performance for all your multimedia needs․
Remote Control Functions
The remote control offers intuitive navigation with essential buttons for power‚ volume‚ and channel selection․ It enhances your viewing experience with ease and convenience․
4․1 Understanding the Remote Control Layout
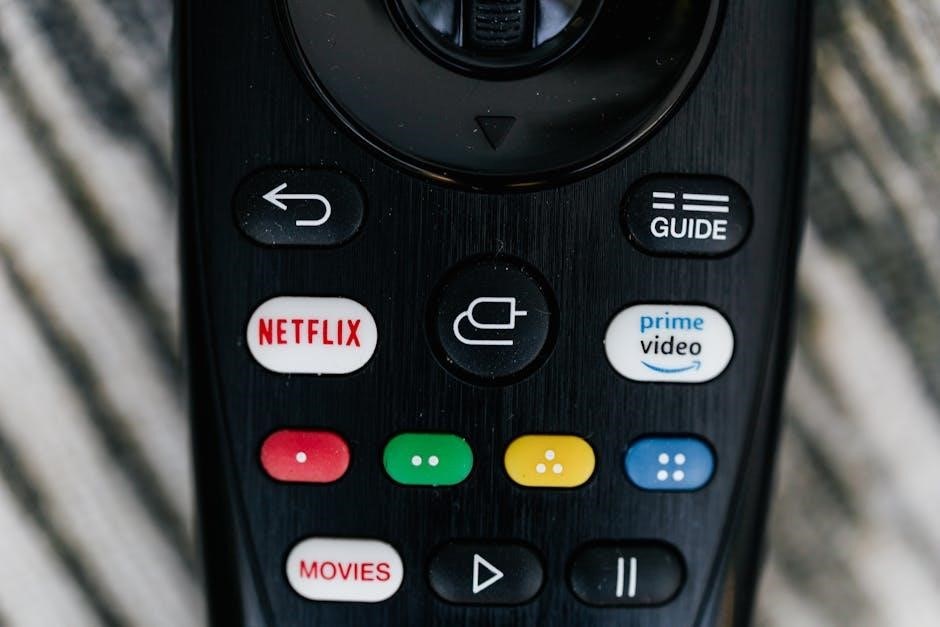
The remote control features a user-friendly design with clearly labeled buttons․ Key controls include the power button‚ volume adjustment‚ channel navigation‚ and menu access․ The layout is intuitive‚ with frequently used buttons centrally located for easy access․ Special function buttons‚ such as input selection‚ are organized logically․ Familiarizing yourself with the remote’s layout ensures seamless operation of your Dynex TV․
4․2 Basic and Advanced Remote Control Features
The remote offers basic controls for volume‚ channel‚ and menu navigation․ Advanced features include programmable buttons‚ voice control‚ and customizable shortcuts․ Users can access multi-device control‚ enabling seamless operation of connected devices․ The remote also supports one-touch access to streaming services․ By exploring these features‚ you can enhance your viewing experience and personalize your Dynex TV setup for greater convenience and control․

Picture and Sound Settings
Optimize your viewing experience by adjusting picture and sound settings․ Customize brightness‚ contrast‚ and color balance for vivid visuals․ Explore preset modes like Movie or Sport for enhanced clarity․ Personalize audio settings with equalizer options to achieve the perfect sound quality for immersive entertainment․
5․1 Adjusting Picture Settings for Optimal Viewing
Access the picture settings menu to customize your viewing experience․ Adjust brightness‚ contrast‚ and color balance for optimal clarity․ Use preset modes like Movie or Sport to enhance visuals․ Enable features like motion smoothing or dynamic contrast for better image quality․ Fine-tune settings based on lighting conditions or content type․ Ensure the picture mode matches your preference for the best display performance․
5․2 Customizing Sound Settings
Access the sound settings menu to tailor audio preferences․ Adjust equalizer settings for bass‚ treble‚ and balance․ Enable surround sound or stereo mode for immersive audio․ Use volume leveling to maintain consistent sound levels․ Select preset audio modes like Movie or Music for enhanced clarity․ Customize settings based on content type or personal preference to optimize your listening experience․
Connectivity Options
Explore various connectivity options to enhance your Dynex TV experience․ Utilize HDMI ports for high-definition devices‚ USB ports for media playback‚ and wireless/ethernet for internet access․
6․1 HDMI and USB Port Connections
Connect your devices seamlessly using HDMI ports for high-definition output and USB ports for media playback․ HDMI ensures crisp video and audio‚ while USB supports file transfers․ Use high-quality cables for optimal performance and ensure devices are properly connected․ Refer to your TV’s manual for compatible formats and troubleshooting tips․ This setup enhances your entertainment experience with external devices․
6․2 Wireless and Ethernet Connectivity
Wireless and Ethernet connections enable your Dynex TV to access the internet seamlessly․ For wireless‚ select your network from the available options and enter the password․ For Ethernet‚ connect the cable to the TV and your router․ A wired connection offers more stability and faster speeds‚ ideal for streaming․ Ensure a stable connection for streaming and firmware updates․ Refer to your manual for troubleshooting network issues․
Navigating the TV Menu
Access the on-screen menu using your remote control․ Navigate through options like Picture‚ Sound‚ and Settings․ Customize preferences to enhance your viewing experience․
7․1 Accessing and Navigating the On-Screen Menu
Press the Menu button on your remote to access the on-screen menu․ Use the arrow keys to navigate through options like Picture‚ Sound‚ and Settings․ Highlight your selection and press OK to enter submenus․ Adjust settings as needed‚ then exit by pressing Return or Menu again․ The menu is user-friendly‚ allowing easy customization of your viewing experience․
7․2 Customizing Menu Settings
Customize your TV settings by adjusting options in the Picture‚ Sound‚ and System menus․ Modify brightness‚ contrast‚ and color balance for optimal image quality․ Personalize sound settings like equalizer presets or enable surround sound․ Additional features include parental controls‚ language selection‚ and screen timeout adjustments․ Save your preferences to enjoy a tailored viewing experience․ Ensure changes are saved before exiting to apply them permanently․
Troubleshooting Common Issues
Troubleshoot common problems like picture distortion or sound loss․ Check connections‚ restart the TV‚ and ensure firmware is updated․ Refer to the manual for solutions․
8․1 Diagnosing and Resolving Picture Issues
Diagnose picture issues by checking connections and settings․ Ensure all cables are securely connected to the correct ports․ Adjust display settings or reset to factory defaults if needed․ Check for firmware updates‚ as outdated software can cause display problems․ If issues persist‚ refer to the user manual or contact customer support for further assistance․
8․2 Solving Sound and Connectivity Problems
Resolve sound issues by checking volume levels‚ ensuring mute is off‚ and verifying audio settings․ For connectivity problems‚ ensure cables are securely connected and restart devices․ Switch HDMI ports or test wireless network connections․ Reset to factory settings if issues persist․ Update firmware for improved performance․ If problems remain‚ contact Dynex customer support for professional assistance․
Firmware Updates and Maintenance
Regular firmware updates improve performance and add features․ Check for updates via USB or online․ Perform routine maintenance like cleaning and ensuring proper ventilation for optimal functionality․
9․1 Updating TV Firmware
Updating your Dynex TV’s firmware ensures access to the latest features and improvements․ To update‚ connect your TV to the internet‚ navigate to the settings menu‚ and select the firmware update option․ Follow on-screen instructions to download and install the update․ Alternatively‚ you can download the firmware from the official Dynex website onto a USB drive and apply it manually․ Always use a stable internet connection or a verified USB file to avoid installation issues․ Regular updates help maintain optimal performance and security for your TV;
9․2 Regular Maintenance Tips
Regular maintenance ensures your Dynex TV performs optimally․ Clean the screen with a dry cloth to avoid dust buildup․ Avoid exposure to moisture or extreme temperatures․ Ensure proper ventilation by keeping vents unobstructed․ Avoid placing the TV near heat sources like radiators․ Organize cables neatly to prevent damage․ Periodically check for firmware updates to maintain performance․ By following these tips‚ you can extend the life of your TV and ensure consistent quality․
Warranty and Customer Support
Your Dynex TV comes with a warranty covering manufacturing defects․ For support‚ contact Dynex customer service via phone‚ email‚ or their official website for assistance and inquiries․
10․1 Understanding Your Warranty Coverage
Your Dynex TV warranty provides coverage for manufacturing defects‚ ensuring repairs or replacements within a specified period․ Typically‚ warranties last one year from purchase‚ covering parts and labor․ Registration may be required for validation․ Damage from misuse or normal wear and tear is excluded․ Review your warranty document for full terms and conditions․ For details‚ refer to the user manual or visit Dynex’s official website․
10․2 Contacting Dynex Customer Support
For assistance with your Dynex TV‚ contact customer support via phone‚ live chat‚ or email through their official website․ Support is available Monday-Friday‚ 9 AM-6 PM EST․ Visit the Dynex website for the most up-to-date contact information․ When reaching out‚ have your TV’s model number and purchase details ready to expedite service․ Dynex’s support team is dedicated to resolving your queries efficiently․
