Zoom H2n Handy Recorder User Manual: A Comprehensive Guide
This manual details the Zoom H2n’s features, covering setup, recording modes, and troubleshooting․ It addresses API integration challenges, firmware updates, and file management, based on user experiences from 2021-2026․
The Zoom H2n Handy Recorder is a versatile and portable audio recording device, favored by musicians, podcasters, and field recordists alike․ Released as a successor to the popular H2, the H2n boasts improved microphone technology and expanded recording capabilities․ This manual serves as a comprehensive guide to unlocking the full potential of your H2n, from initial setup to advanced recording techniques․
Users frequently utilize the H2n for capturing high-quality audio directly to SD cards, eliminating the need for external interfaces or complex setups․ Its compact size and intuitive interface make it ideal for on-the-go recording, whether documenting live performances, conducting interviews, or simply capturing ambient sounds․ The device’s popularity is evidenced by the availability of extensive sample packs, like the 162-sample drum kit collection recorded specifically with the H2n․
However, integrating the H2n with other platforms, such as Office 365, can present challenges, as reported by users experiencing synchronization errors․ Furthermore, developers working with the Zoom Linux SDK have encountered issues obtaining bearer tokens for server-to-server applications․ This manual will address these common hurdles alongside providing detailed instructions for core functionality, ensuring a smooth and productive recording experience․

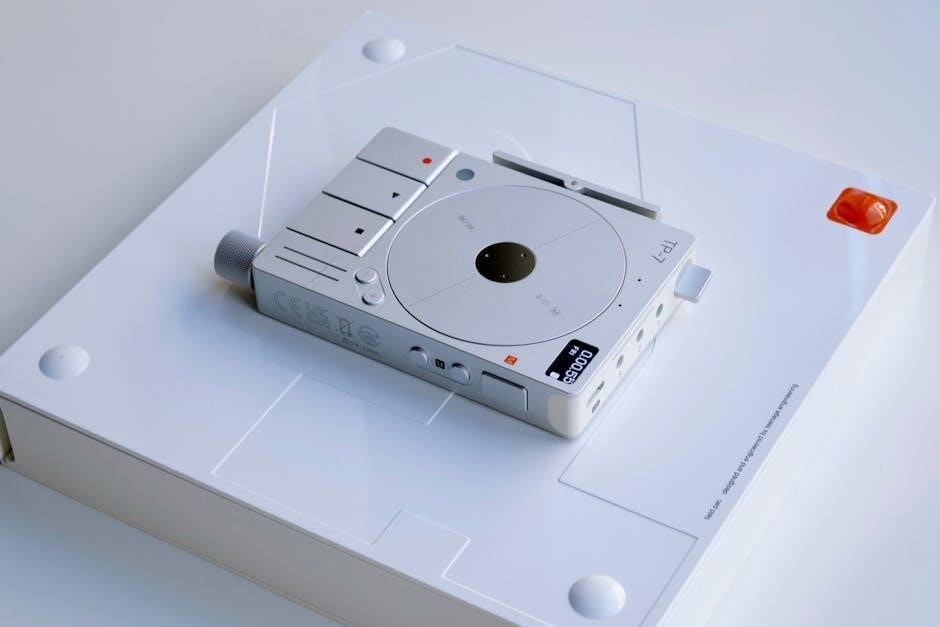
Unboxing and Initial Setup
Upon unboxing your Zoom H2n, you should find the recorder itself, a USB cable for data transfer and power, and a quick start guide․ Before first use, it’s crucial to verify all components are present and undamaged․ Insert a compatible SD card (SDHC/SDXC) into the designated slot – the H2n does not have internal memory․ Ensure the card is formatted correctly; Zoom recommends FAT32 for optimal compatibility;

Connect the H2n to your computer using the provided USB cable․ This allows you to charge the device (though batteries can also be used – see later sections) and access the internal storage via your operating system․ While connected, download and install the latest firmware from the Zoom website․ Keeping your firmware updated is vital for stability and access to new features, addressing issues reported as recently as 2025․
Initial setup involves setting the date and time, and configuring basic recording parameters․ Familiarize yourself with the power button, record button, and menu navigation․ Users have reported occasional recording failures, so verifying proper SD card insertion and sufficient battery life are essential first steps․ A Russia-specific manual addendum exists, highlighting regional considerations․
Understanding the H2n’s Recording Modes
The Zoom H2n boasts versatile recording modes tailored for diverse applications․ Its core functionality revolves around MP3 and WAV formats, with WAV offering superior audio quality for professional use․ The H2n uniquely features four distinct microphone configurations: X/Y, Mid-Side (MS), and dedicated front/rear microphone settings․ X/Y provides stereo imaging, while MS excels in adjustable stereo width․
Understanding these modes is crucial for optimal results․ Front/rear is ideal for interviews or capturing ambient sound from multiple directions․ The recorder also supports automatic and manual gain control, impacting recording levels․ Users integrating the H2n with Zoom Meetings via server-to-server APIs should prioritize WAV for clarity during recordings of meeting discussions․
Furthermore, the H2n offers pre-record buffer functionality, capturing a short audio segment before you press record – useful for spontaneous events․ Be aware that some users have experienced recording status discrepancies (red dot visible, but no file saved), so regularly check file creation during longer sessions․ Proper mode selection directly impacts the quality of your 162 drum kit samples or podcast recordings․
Navigating the H2n’s Interface
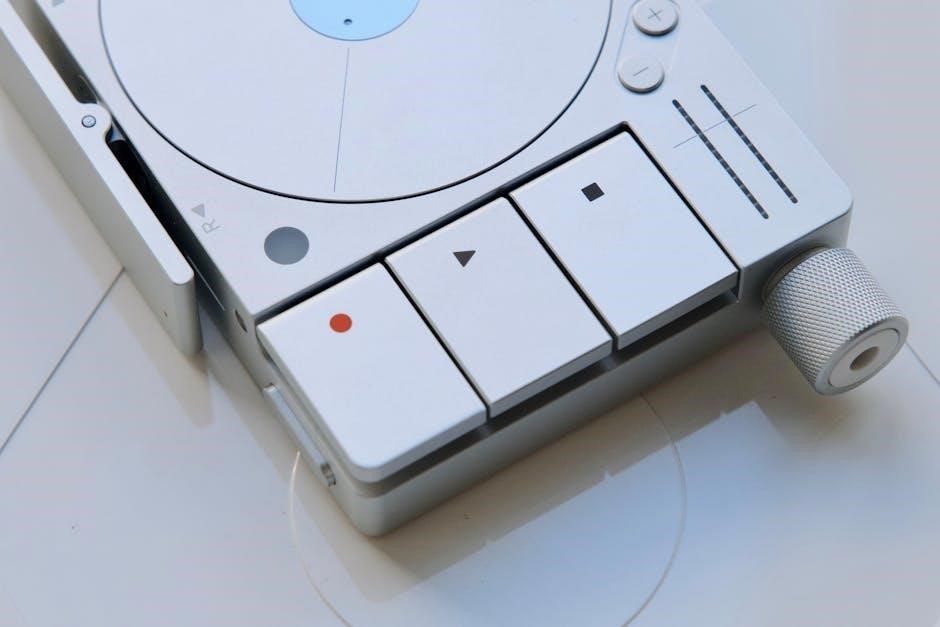
The Zoom H2n features a relatively straightforward interface, centered around a central control dial, a color LCD screen, and several dedicated buttons․ The menu system is hierarchical, accessed via the MENU button, allowing navigation through settings like recording format, microphone selection, and gain levels․ The dial facilitates scrolling and selection within menus․
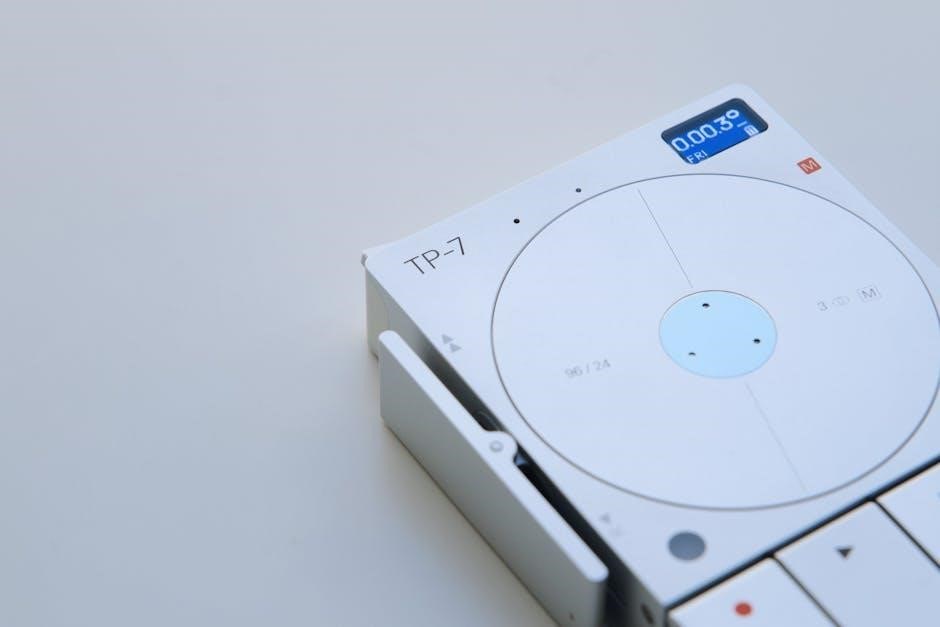
Key buttons include RECORD, PLAY/PAUSE, STOP, and dedicated buttons for adjusting input levels․ The LCD screen displays crucial information such as recording time, battery life, and selected recording mode․ Familiarizing yourself with the button layout is essential for quick adjustments during recording sessions, especially when capturing spontaneous events․
Users attempting server-to-server API integration shouldn’t need to directly interact with the H2n’s interface during automated meeting recordings․ However, understanding the interface is vital for troubleshooting potential issues, like verifying recording status (the red dot indicator) or confirming file creation․ Remember reported instances of the red dot appearing without a saved file – regular checks are advised․
Microphone Selection and Patterns
The Zoom H2n boasts four built-in microphones, offering a variety of recording patterns to suit different scenarios․ These include X-Y, A-B, and Mid-Side configurations, selectable through the device’s menu․ X-Y provides excellent stereo imaging with good mono compatibility, ideal for music recording and general use․ A-B captures a wider stereo field, suitable for ambient recordings and spacious soundscapes․
Mid-Side is particularly useful for adjusting stereo width in post-production, offering flexibility in mixing․ The H2n automatically adjusts microphone sensitivity based on the selected pattern․ Understanding these patterns is crucial for achieving optimal sound quality․ For example, when integrating with Zoom Meetings via APIs, the chosen pattern impacts how participants are captured․
While API integration focuses on the meeting itself, the H2n’s microphone selection directly affects the quality of the recorded audio․ Users experiencing issues with audio clarity should experiment with different patterns to find the best fit for their environment and recording needs․ Remember to consider the room acoustics and the source material․
Using the H2n for Music Recording
The Zoom H2n excels as a portable music recording device, offering several features beneficial for musicians․ Utilizing the X-Y microphone pattern is recommended for capturing stereo instruments like guitars or keyboards, providing focused imaging and mono compatibility․ For ensembles or ambient instruments, the A-B pattern creates a wider soundstage․ Remember to adjust gain levels carefully to avoid clipping or excessive noise․
Experiment with microphone placement to achieve the desired sound․ Close-miking techniques yield a direct, intimate sound, while distant miking captures more room ambience․ The H2n’s built-in limiter can prevent unwanted peaks during dynamic performances․ When recording drums, consider using the H2n alongside additional microphones for a fuller sound, though the included samples demonstrate its capabilities․
Post-recording, utilize audio editing software to refine the sound, adjust EQ, and add effects․ While the H2n doesn’t directly integrate with Office 365 for music sharing, recorded files can be easily transferred for distribution․ Proper gain staging and pattern selection are key to high-quality music recordings․
Recording Podcasts with the Zoom H2n
The Zoom H2n is a versatile tool for podcasting, offering simplicity and portability․ The X-Y microphone configuration is ideal for capturing voices, providing clear and focused audio․ Ensure a quiet recording environment to minimize background noise, as the H2n, while capable, isn’t designed for extensive noise reduction․ Proper microphone technique – maintaining consistent distance and speaking clearly – is crucial for optimal results․
Utilize the H2n’s built-in limiter to prevent audio peaks from clipping, especially during enthusiastic discussions․ Experiment with gain settings to find a balance between a strong signal and minimal noise․ While direct integration with Zoom Meeting APIs for live recording isn’t a feature, the H2n captures high-quality audio for post-production editing․
After recording, transfer files to a computer for editing․ Software can be used to remove unwanted sounds, adjust levels, and add intro/outro music․ Despite reported issues with recording status display, ensure files are saved correctly․ The H2n provides a reliable foundation for professional-sounding podcasts․
Field Recording Techniques
Field recording with the Zoom H2n demands adaptability․ Utilize its various microphone patterns – X-Y, M-S, and 90° – to suit the environment․ The X-Y pattern excels in mono compatibility and focused sound capture, ideal for interviews or specific sound events․ M-S offers wider stereo imaging, while 90° is suited for ambient recordings․
Prioritize minimizing handling noise; a shock mount is highly recommended․ Monitor audio levels closely using headphones to prevent clipping or excessively low recordings․ Experiment with placement – closer proximity yields a stronger signal but can introduce proximity effect (bass boost)․ Consider the acoustic environment; reflective surfaces can cause unwanted reverberation․
Though direct API integration for live streaming isn’t a core function, the H2n’s portability allows capturing unique sounds․ Be mindful of battery life, especially during extended sessions․ Post-recording, careful editing can enhance the captured audio, addressing any environmental challenges․ Remember, successful field recording relies on preparation and attentive listening․
Adjusting Audio Levels and Gain
Proper gain staging is crucial for optimal recordings with the Zoom H2n․ Avoid setting gain too high, which leads to clipping and distortion – a common issue reported by users․ Conversely, excessively low gain results in a noisy signal requiring amplification in post-production․ Utilize the H2n’s input level controls to find the sweet spot․
Monitor audio levels visually using the H2n’s display and aurally with headphones․ Aim for peaks around -6dBFS to leave headroom․ The auto-level function can be a starting point, but manual adjustment is often necessary for nuanced control․ Be aware that different microphone patterns require varying gain settings․
When integrating with other systems via APIs, ensure consistent level matching․ While the H2n doesn’t directly address Office 365 sync errors, proper gain ensures clean audio for any subsequent processing․ Regularly check levels throughout a recording session, as sound sources can fluctuate․ Experimentation is key to mastering gain adjustment․
File Management and Transfer
The Zoom H2n records in various formats, primarily WAV and MP3․ WAV files offer superior audio quality but require more storage space․ MP3 provides compression for smaller file sizes, suitable for sharing or limited storage․ Regularly review and organize your recordings to prevent clutter․
Transferring files is straightforward via USB connection to a computer․ The H2n appears as a removable drive, allowing drag-and-drop file transfer․ Ensure your computer recognizes the device; driver issues are rare but possible․ Consider using dedicated audio editing software for batch processing and renaming files․
For server-to-server applications utilizing Zoom APIs, understanding file formats is vital for compatibility․ While the H2n itself doesn’t directly integrate with Office 365, properly formatted audio files are essential for any linked workflows․ Back up your recordings regularly to prevent data loss, especially crucial for important meeting discussions or drum kit samples․
Troubleshooting Common Issues
A frequent issue is the H2n not being recognized by a computer․ Try a different USB cable and port, and ensure the device is powered on․ Software conflicts can also occur; close unnecessary applications during file transfer․ Another common problem is missing recordings, despite the red dot indicator showing activity – verify sufficient SD card space․
For API integration challenges, particularly with server-to-server applications, double-check your OAuth credentials (Account ID, Client ID, Client Secret)․ Bearer token issues often stem from incorrect configuration or expired permissions․ When integrating with Office 365, compatibility errors may arise; confirm your account type supports the connection․
Wi-Fi connectivity problems, while not directly H2n related, can impact associated workflows․ If using Zoom meetings, ensure a stable internet connection․ If encountering issues with Zoom itself, consult their support documentation․ Regularly check for firmware updates, as these often address known bugs and improve stability․

Zoom H2n Firmware Updates
Keeping your Zoom H2n’s firmware current is crucial for optimal performance and stability․ Zoom periodically releases updates addressing bug fixes, enhancing compatibility, and potentially adding new features․ These updates are typically available for download from the official Zoom website, within the support section dedicated to the H2n․
The update process generally involves downloading the firmware file to your computer, connecting the H2n via USB, and using Zoom’s dedicated update utility․ Always follow the on-screen instructions carefully during the update process; interrupting it can potentially render the device unusable․ Back up any important recordings before initiating an update, as a precaution․
Users have reported resolving various issues, including file transfer problems and API integration glitches, through firmware updates․ Regularly checking for updates – even if you aren’t experiencing immediate problems – is a proactive step towards ensuring a smooth recording experience․ Consult the Zoom support documentation for detailed, step-by-step instructions specific to your operating system․
Powering the H2n: Batteries and USB
The Zoom H2n offers flexible power options, accommodating both battery and USB power sources․ It primarily utilizes standard AA batteries; Zoom recommends using alkaline batteries for extended recording times, though NiMH rechargeable batteries are also supported․ Battery life varies depending on recording settings, microphone usage, and display brightness․

Alternatively, the H2n can be powered via USB․ Connecting it to a computer or a USB power adapter allows for continuous operation, ideal for long recording sessions or when battery replacement isn’t convenient․ USB power also facilitates firmware updates and file transfers․ Note that some users have experienced connectivity issues when relying solely on USB power with certain computers․
The H2n’s display indicates the remaining battery life․ It’s advisable to monitor this indicator during recordings and to carry spare batteries for field work․ When using USB power, the device will prioritize this source, conserving battery life if batteries are also installed․ Proper power management ensures uninterrupted recording․
Integrating with Zoom Meeting APIs (Server-to-Server)
While the Zoom H2n is a standalone recorder, integrating its recordings with Zoom’s platform requires utilizing Zoom’s Server-to-Server APIs․ This isn’t a direct connection; rather, it involves post-processing the H2n’s audio files and uploading them to Zoom’s servers via API calls․

Developers can leverage the Zoom Meeting API to create applications that automatically upload H2n recordings as supplementary materials to existing meetings or store them for later access․ This process typically involves obtaining a bearer token through OAuth, a common authentication method․ However, users have reported difficulties attaining this token, requiring careful adherence to Zoom’s API documentation․
Challenges arise when attempting to create automated meeting agents or record meeting discussions directly through the API, particularly with Zoom’s basic (free) accounts․ Successful integration demands a robust understanding of API endpoints, authentication protocols, and error handling․ The H2n provides the audio source; the API handles the Zoom platform interaction․
Zoom H2n and Office 365 Integration Challenges
Direct integration between the Zoom H2n and Office 365 is not natively supported․ The H2n functions as an audio recording device, while Office 365 is a suite of productivity applications․ Connecting the two requires intermediary steps and workarounds, primarily focused on managing and sharing the audio files generated by the H2n․
Attempts to synchronize calendar events or contacts between the H2n and Office 365 are not feasible․ However, recordings made with the H2n can be uploaded to OneDrive or SharePoint, then linked to relevant Office 365 resources like meeting notes or presentations․ Users have encountered errors during this process, often related to account compatibility or API limitations․
The primary challenge lies in automating this workflow․ While manual uploading is straightforward, integrating the H2n’s recordings directly into Office 365’s ecosystem necessitates custom scripting or third-party tools․ This integration isn’t about a direct connection, but rather about managing the resulting audio files within the Office 365 environment․
